Showing posts with label holiday. Show all posts

Wednesday, December 3, 2014

TDOCNAS 2014: Day 2: Candy Cane Nail Art

I did candy cane nails two or three years ago and remember being so disappointed in how they turned out, so I decided to revisit them this year! I'm happy to say that I'm much more pleased with how these turned out! I decided to stamp them instead of trying to use tape and I'm way, way happier with them.


I used China Glaze With Love as my base color and stamped over it using a wavy stripe pattern from Bundle Monster plate BM-207 and Konad Special White polish. I topped everything with a coat of Zoya Sparkle Gloss and KBShimmer Clearly on Top and called it a day! I'm always surprised at how vividly the Konad white polish stamps over colors, but I guess that's what it was made for.


Are you all decorated for the holidays? We have our annual ugly sweater party coming up next weekend so I've been decorating for a while trying to get the house perfect!

Friday, April 18, 2014

Polka Dot Easter Nail Art Design

Happy Friday!! I have a half day at work today so I'm a very happy girl! Today I want to share with you one of the designs that is featured in my book for Easter. I picked out four pastel shades that looked good together and painted each nail with a different color. After that was dry, I dotted some pastel polka dots and some smaller white dots in between with a dotting tool. They're like little dotty eggs! :P

Monday, March 31, 2014

Freak Show Polish Swatches/Review

This post should really be titled "Why I'm the Worst Blogger Ever." I've had these polishes to share since NOVEMBER and they somehow never made it up here! I SUCK and I truly apologize for this because these are some fabulous polishes. What I have here is the Christmas Under the Big Top collection and part of the Zodiac collection from Freak Show Polish. It seems fitting to share the Christmas collection even though it's March, since it started snowing outside as I'm writing this. I guess spring isn't quite here yet after all.

Snowflake Covered Presents is a glitter top coat with black, white, turquoise, and magenta hex and circle glitter. This is two coats.


Mister Snowman has a shimmery gray base filled with black, white, yellow, and blue glitter. This needed three coats for what you see here, but you could also layer it over a gray base.


A Very Merry Christmas Tree is one of my favorites, a squishy white base with red, green, and white glitter. This is three coats, but again, you could layer this over white for a more opaque look.


Hot Toddies is a gorgeous deep magenta/berry shimmer with purple and pink glitter. This one only needed two coats for opacity.


Yuletide Cheer is a unique jade polish with an abundant mix of brown, silver, blue, and gold glitter. I used three coats here for maximum opacity and glitter.


Naughty or Nice is a blue and purple based glitter topper. This is two coats.


Pisces is a lovely green and blue based micro glitter topper. This is two coats.


Gemini is a blue based micro glitter topper. It also has purple and black mixed in there. This is two coats.


Aquarius is a mix of red, blue, and silver micro glitter in a clear base. This is two coats over black.

The bad news is that the Christmas Under the Big Top collection doesn't appear to be available anymore. The good news is that the formula was great on all these polish, so I'm sure you couldn't go wrong with any of the currently stocked ones! You can check them out on the Freak Show Polish online store and give their Facebook page a visit too while you're at it! ;) 

The products in this post were provided for my honest review. All opinions are my own. 

Wednesday, December 25, 2013

TDOCNAS: Day 12: Festive Stamped Scroll Design - MERRY CHRISTMAS!

Merry Christmas to everyone who will be celebrating today! And to everyone who doesn't celebrate Christmas, I hope you have a great day! The last design for my Twelve Days of Christmas series began with a sponged gradient of red, green, and gold. Specifically, I used China Glaze Cranberry Splash, Jolly Holly, and Zoya Ziv. I went over it once or twice to make sure it was saturated and vibrant and then I stamped the scroll design from Gals plate GA33 (I think!) in white over top.


I want to end this post with two separate inquiries. First, tell me what you thought about this series! Did it inspire you to do some nail art of your own? What would you like to see for next year's Twelve Days of Christmas series?

Secondly, I want to know what your favorite Christmas tradition is! Where do you spend the holidays? Do you rush around to a bunch of different family member's houses or do you get to relax a little at one place? What do you eat? Do you do a secret santa or do you buy gifts for everyone?

I'll be visiting my parents and my fiancé's parents this morning and then heading to my grandparent's for the rest of the day (and for an awesome ravioli dinner!). Joe and I opened our presents last year on Christmas Eve after he proposed to me, so we did that again last night! Anyway, have a fantastic day everyone!! :-*

Monday, December 23, 2013

TDOCNAS: Day 11: Minimalist Christmas Tree Nail Art

Ah, Monday again! I won't be too miserable today though because there's only two days left until Christmas! This month really flew by. Today I have some super simple minimalist Christmas tree nail art to share with you. :)


I started out with two coats of Essie Sand Tropez for my base color and allowed it to dry completely so I could form the tree shapes using tape on top of it. I painted China Glaze Glittering Garland inside of the taped area and carefully peeled the tape away right after. I finished the nails with a golden yellow rhinestone at the top of each tree and a coat of top coat to seal everything in. I'm always so intrigued by minimalism and I love how these turned out!

Monday, December 16, 2013

TDOCNAS: Day 8: Santa's Belt Nail Art

Good morning everyone! Today's nail art was inspired by Santa's belt. I started with a base of two coats of China Glaze With Love. I carefully painted a horizontal stripe of black across each nail and then used Milani Signature Gold to paint the buckle.


I can't believe that we're already on Day 8! Christmas is only 9 days away! Have you finished all your holiday shopping? How about wrapping?

Wednesday, December 11, 2013

TDOCNAS: Day 6: Santa Hat French Manicure Nail Art

Good morning everyone! I have to admit, I am SO excited about all of these designs! I keep wanting to type "these are my favorite!" for each one of these posts, but I suppose that would get a bit redundant. I love a fun twist on a french mani and these are about as fun as it gets!


I started out with a base of OPI Don't Burst My Bubble and I used Essie Leading Lady to create a thick red tip and a bit of a curved shape for the rest of the hat. Then, I created the fur trim by dotting white polish along the red tip. I finished the design off with a silver rhinestone at the tip of each hat and a coat of top coat. They're so darn cute!

Wednesday, December 4, 2013

TDOCNAS: Day 3: Simple Snowman Nail Art

Good morning everyone! Today I have some seriously simple nail art for you inspired by snowmen! To create this look, start with a plain white base. Then, use a liquid eyeliner pen to create the hat, eyes, and mouth of the snowmen on each nail. Finally, take a small nail art brush and an orange polish and paint the noses on each nail. See, I told you it was easy!


I'll see you on Friday with some more nail art! :D

Friday, November 29, 2013

TDOCNAS: Day 1: 365 Days of Color Elf-Tastic Christmas Collection Swatches/Review & Elf Nail Art

Good morning everyone!! Today is the kickoff of my Twelve Day of Christmas nail art series (or TDOCNAS for short). This series will post on Monday/Wednesday/Friday starting today and ending on Christmas day. I couldn't think of a better way to start off the series than with a collection and some nail art inspired by one of my very favorite holiday movies, "Elf"! The Elf-Tastic Christmas collection by 365 Days of Color consists of four gorgeous shades inspired by the movie "Elf". Let's take a look!

SANTA!! OH MY GOD!! is a gorgeous warm pink holographic shade with a great formula. This is three coats.


Code of Elves is a sheer jelly gray polish with a gorgeous mix of gold, white, blue, gold, and black glitter, as well as snowflake glitter! I prefer a more opaque look, so I chose to layer two coats over Zoya Carey.


Cotton-Headed Ninnymuggins was inspired by Buddy's outfit and consists of gold, green, pink, and a random mix of other colors in a clear base. This is two coats over OPI My Vampire's Buff.


Four Main Food Groups is a fantastic mix of mainly red, green, gold, and white glitter in a clear base. This one truly reminds me of candy! This is two coats over Rescue Beauty Lounge Bella.


Since Cotton-Headed Ninnymuggins was inspired by Buddy's outfit in the movie, I decided to do some nail art inspired by his outfit and the poster for the movie. I used a base of OPI My Vampire's Buff and sponged Cotton-Headed Ninnymuggins on all but my index finger.


For Buddy's outfit, I used Sally Hansen Insta Dri in Lightning for the tights, Zoya Hunter for the outline of the jacket, Zoya Apple for the inside of the coat, China Glaze Mingle with Kringle for the belt buckle, and a black liquid eyeliner pen for the belt and shoes. The shoes didn't come out the greatest but overall I think it's adorable!


This collection is available now on 365 Days of Color's online store! ;) I'm so in love with this entire collection! Which is your favorite? Do you love "Elf" as much as I do?? Make sure to come back on Monday for day two of the Twelve Days of Christmas series!!

The products in this post were provided for my honest review.

Wednesday, February 13, 2013

Born Pretty Store Stamping Plate & Rhinestone Review

I got this stamping plate from the Born Pretty Store a while ago for review because I loved the adorable mustaches on it, but I knew it'd also be perfect for a Valentine's Day mani since it has a bunch of different lip images on it. I love how the mani turned out!


I started out with the Zoya ombré that you see below, using Reagan on my pinkie, followed by Lara, Shelby, and GeiGei. I stamped lips and mustaches over my base and added some rhinestones in two different size; the larger ones are here and the smaller ones are here.


If you are going to order from the Born Pretty Store, don't forget to use my discount code for 10% off! You can find it over in the left hand sidebar of the blog. :)

Products provided for review

Wednesday, December 12, 2012

Zoya Christmas Tree Tape Mani

Good morning! I am one day away from being done with school for the semester, which means more nail time! Yay!! Today, I have some shimmery Christmas tree nails for you guys.


I started out with three coats of Zoya Ziv on all nails except my ring nail, which has two coats of Rekha. Once Rekha was completely dry, I used strips of tapes to form a tree shape and painted over it with Logan. I top coated everything and then topped my tree off with a single star glitter! Hope you like!

Products provided for review.

Friday, December 7, 2012

Party Hearty Glitter Gradient Nail Art

Good morning! I have some more festive nail art for you all today, this time featuring one of my very favorite Christmas polishes: China Glaze Party Hearty. This super easy mani started out with two coats of RBL Bella and ended with Party Hearty sponged from the cuticles to make a gradient. I love that this combination is festive, but kind of fancy too! Do you like it?

Wednesday, December 5, 2012

Christmas Sweater Nail Art

These are probably my favorite Christmas/holiday nails that I've ever done. They turned out so much better than I could have hoped and I'm so glad I tried them out. I might even do these as my actual Christmas Day nails!


I started out with two coats of China Glaze Merry Berry from their Holiday Joy 2012 collection. Then I went through all of my stamping plates and found a lace-y looking design and several holiday-themed images and started stamping! The holly and large snowflake are on Bundle Monster plate BM14 from the old collection. The moose is on BM-214 from the new Bundle Monster collection. The tiny snowflake is from MASH plate m50 and the lace pattern is on MASH plate m57. This is a really easy, but complicated-looking design as long as you can stamp decently. Would you try it?

Friday, November 2, 2012

KBShimmer Winter 2012 Collection Review/Swatches/Photos

You guys are in for a treat today because I have the new KBShimmer Winter collection to show you! I have yet to try a KBShimmer polish that I haven't been impressed with and these are certainly no exception. Just wait and see!

Candy Cane Crush is a festive mixture of red and white hex glitter in multiple sizes and get this: it smells like vanilla peppermint! You know those awesome Twisted Peppermint candles from Bath & Body Works? Imagine that in a polish! The scent gets kind of muddled with the nail polish smell in the bottle, but it's very nice and light when it dries on your nails. It does stick around, but it isn't something that will be giving you a headache!


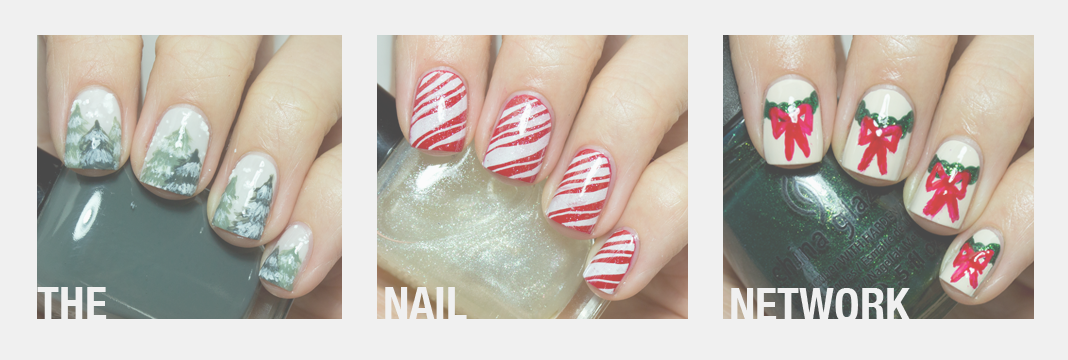
In the above photo, I layered Candy Cane Crush over China Glaze Jolly Holly and below, I layered it over OPI Skull & Glossbones. Two coats were used for each swatch.


All Decked Out is such an awesome and unique polish! Multiple shades of hex glitters and gold star glitters are suspended a deep evergreen jelly base. If this doesn't make you think of Christmas trees, you must not be familiar with the tradition! Haha! :P I used two coats of this beauty here.


Snow Way is so pretty! This delicate shade of baby blue is filled with white glitter and teeny tiny little iridescent glitter that looks like sparkly fresh-fallen snow if you move your hands the right way. I don't think I captured it in this photo, but I was making a ring from it when I noticed the iridescent flash and it made me smile. I used three thin coats here, but two slightly thicker ones would have been sufficient.


Sugar Plum Faerie is amazing! I feel like a broken record but this is what KBShimmer does to me! Just when I think I've swatched the best in the collection, I try the next polish out and have to eat my words. I used three coats here for opacity since the base is jellyish.


Cocoa Nut is a gorgeous mixture of fuchsia and gold glitter in a chocolate brown base. Only two coats were needed here for full opacity.


Hex Appeal is a mixture of silver, blue, and magenta hex and micro bar glitter in a royal blue jelly base. I used three coats here to get maximum glitter payoff and opacity for the jelly base. I will probably layer this one next time I use it though.


Berry Christmas is similar in concept to Cocoa Nut, it has a berry colored base with red, pink, purple, and a little bit of gold glitter. I used two coats here. I'm not typically a huge fan of red, but I love this one!


We Three Blings is one of the most unique gold topper shades that I've come across. It has a mix of gold shimmer, flakes, and holographic glitter. I layered one coat here over Essie Very Structured.


Wrapper's Delight is the last shade in this collection and certainly one of the best. Perhaps the best part though, is that $5 from the purchase of every bottle will be used to buy toys which will be donated to Toys for Tots. This is the definition of a festive polish, with red, green, and gold glitter suspended in a clear base.


I layered two coats of Wrapper's Delight over Nicole by OPI Here We Kome A-Karoling in the above photo and over Rescue Beauty Lounge Bella below.


This collection will be available for purchase on November 15th on KBShimmer's website. They will retail at $8.75 with the exception of Wrapper's Delight, which will be $10. Are any of these going to make it on your wish list?

*Products in this post were provided for my honest review.*

Saturday, December 24, 2011

Merry Christmas Eve!

I thought you guys might be interested in seeing what I'll actually be wearing on my nails for Christmas, so here it is! I'm planning on wearing a berry-colored sweater dress with leggings, so I decided to be outfit-matching-festive instead of all-out-red-and-green-festive.


I used three coats of Dr.'s Remedy PASSION Purple with Julep Trina sponged onto the tips. I stamped the snowflake with Orly Shine and added a clear rhinestone to the center. I'm very pleased with how it turned out. See you all on Monday! :)

Friday, December 23, 2011

Day 12: Hot Chocolate

Hello all! Welcome to the last day of my 12 Days of Christmas (and winter/holiday) Manis! I hope you have enjoyed everything I've come up with so far. I have to say, I think this might be one of my very favorite designs. It's adorable! 


I started out with two coats of OPI Decades of Shades. Once that was dry, I stamped "steam" with OPI Espresso Your Style on all my nails. I created the mug with a silver Sally Hansen nail art pen and blobbed the whipped cream on with Konad special white polish; I used the Konad polish to draw the candy cane as well. To give the whipped cream a little more depth, I brushed some Sally Hansen Diamonds on top of it and finished the candy cane with Zoya Sooki stripes.


Thanks for sticking with me through this series and I hope you enjoyed it! I hope everyone has a safe and fantastic holiday! :D

Wednesday, December 21, 2011

Day 11: Candy Canes

My mother wanted to see a candy cane mani, so I made her a candy cane mani! I used tape to create the stripes, but I think that I may have liked it more if I used a striping brush or smaller strips of tape. I used two coats of China Glaze Frosty as my base and applied my tape strips after my base dried. I painted over the tape with Julep Brooklyn and then layered China Glaze Ruby Pumps over Brooklyn to help smooth it out. I think I like the thickness of the stripes best on my pinky and ring fingers.

Friday, December 16, 2011

Day 9: Snowy winter morning

Hola! I have a very special feature for today's post! Today I used one of the Girly Bits polishes that I got to review called January Morning. I will have a full review of all the Girly Bits polishes I was sent soon, but if you would like more info about the brand and how to order, you can click HERE. This is one coat of January Morning over two coats of Zoya Kristen.


Isn't it amazing? It's just like looking out the window after a fresh, twinkling snow with a beautiful blue sky. I have a feeling that January Morning would look awesome layered over any pastel shade. Here is a macro shot of three coats by itself:


How is everyone holding up with the holiday stress? Have you gotten all your shopping done? Are your cookies all baked? Are you sending some to me?? ;) 

Wednesday, December 14, 2011

Day 8: Gifts w/Zoya Noel

I hope I'm not throwing you off with this horizontally oriented photo. :P I wasn't happy that the silver gift stamp blends in with the blue glitter in all of my photos, so this was the best way I could position it for your viewing pleasure. It stands out more in person, I promise. Anyway, for this mani I started out with two coats of Zoya Noel, which is amazing by the way. As you can see, Noel is a medium blue/aquamarine-y foil with tiny, tiny bits of silver in it. Icy and awesome. 


I sponged Milani Blue Flash on the tips and then sponged Sally Hansen Diamonds on top of that because it STILL wasn't sparkly enough. ;) Lasty, I stamped the gift with Orly Dazzle and topped it off with a light blue rhinestone. I wasn't really crazy about this one at first, but it has grown on me. I know I haven't given you guys a nice macro shot in a while, so here you go! Enjoy!

Monday, December 12, 2011

Day 7: Glittering Garland & Holly Leaves

This is gorgeous! I can't believe it took me so long to wear China Glaze Glittering Garland. It seriously is the most sparkly, amazing green polish I've ever worn. It is part of the 2011 holiday collection from China Glaze called Let It Snow and you can probably still find it at Sally Beauty or online. Snatch it up!


I used two coats of Glittering Garland for what you see above. Make sure you let the coats dry sufficiently in between applying them or else the brush will drag and create bald spots. When that was all dry, I stamped holly leaves with Color Club Perfect Mol-ten and added red rhinestones for the berries. This is another really low-key holiday design that I loveeeee! Would you wear this?